
This is the one I made today...


This one is a Tudor thatched cottage, and I've altered the die cut to add another window. This was achieved by cutting out two sets of the dwelling and then snipping off the window on the right and left side of each of the second set, including the tab, and glueing those to the tabs on th first set, so adding an extension. I also had to add an extra strip to the roof piece - though take care which side you add the piece to as I put it on the wrong side to start with and so the dormer didn't sit in the right place. I'm sure you'll not be as stupid as me though.
The beauty of 'black and white' houses is that they tend to be a bit on the squint, so any mistakes can be put down as historical accuracy. For instance, I made my back extension a little too wide and now the back of the cottage is slightly curved. ;-) but that's fine by me. But my one big piece of advice when doing a black and white house is to draw all the lines before sticking the walls together. It makes decorating so much easier.
I had such fun drawing the lines. Google 'black and white Tudor house' and you get some amazing images to work from. And if your hand is a little wobbly then that adds authenticity too. These houses are NEVER made in straight lines!
The windows in made slightly differently this time. I used some frosted paper one of last year's Xmas cards. This paper had some images on it so I cut away the mostly blank bits, and used those. I kept a couple of pieces with images and coloured them in using alcohol ink pens so you can see a Xmas tree, parcel and a star through the front windows. I had decided not to do diamond panes of glass, but it didn't look right once I the Windows were stuck on. I drew panes with a graphite pencil and actually like this technique better than using the ink pen like I did on the pub. Can get window panes much more to scale.
I cut out another door using a bit of card with spare window from the cannibalised set. I made this a rectangular door as the curved one just isn't right for a Tudor house, I painted it black and covered it in glossy accents so it looks painted. The wreath decoration is a snip from a jewelled ribbon that I coloured with alcohol ink.
The thatched roof is felt sprayed th adirondack espresso ink, and the dormer has been shortened so it doesn't stick out over the roofline by much. I had to hand cut the snow felt as the roof is a little longer due to the extension. I made the chimney in red 'Tudor bricks' (barn door and fired brick distress pens).
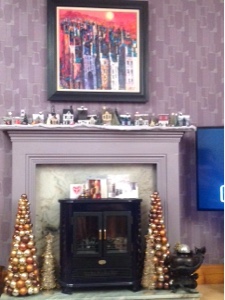
These little house look amazing when lit with a battery operated candle. I can't wait for Xmas day when I can switch them all on.
Merry Christmas everyone.
I just came to your blog again today. It's funny that I have just finished drawing a tudor house to cut out. I have found, like you, that it is best to do most of the decorating before you glue it together. When your mantle gets full then you have to start taking over bookcases, the tops of shelves, etc.
ReplyDeleteI've got another village on the sideboard in the dining room but...Yes! Top of the bookcase is still free, good idea Lucy. Looking forward to seeing your Tudor house..
DeleteVery nice. I just bought these dies in the last 10 days and have so many ideas in my head for them. Thanks for sharing your creations.
ReplyDelete